


It's about time to practice our Yattag skills and start generating HTML.
What will we make? This form(here's the HTML code).
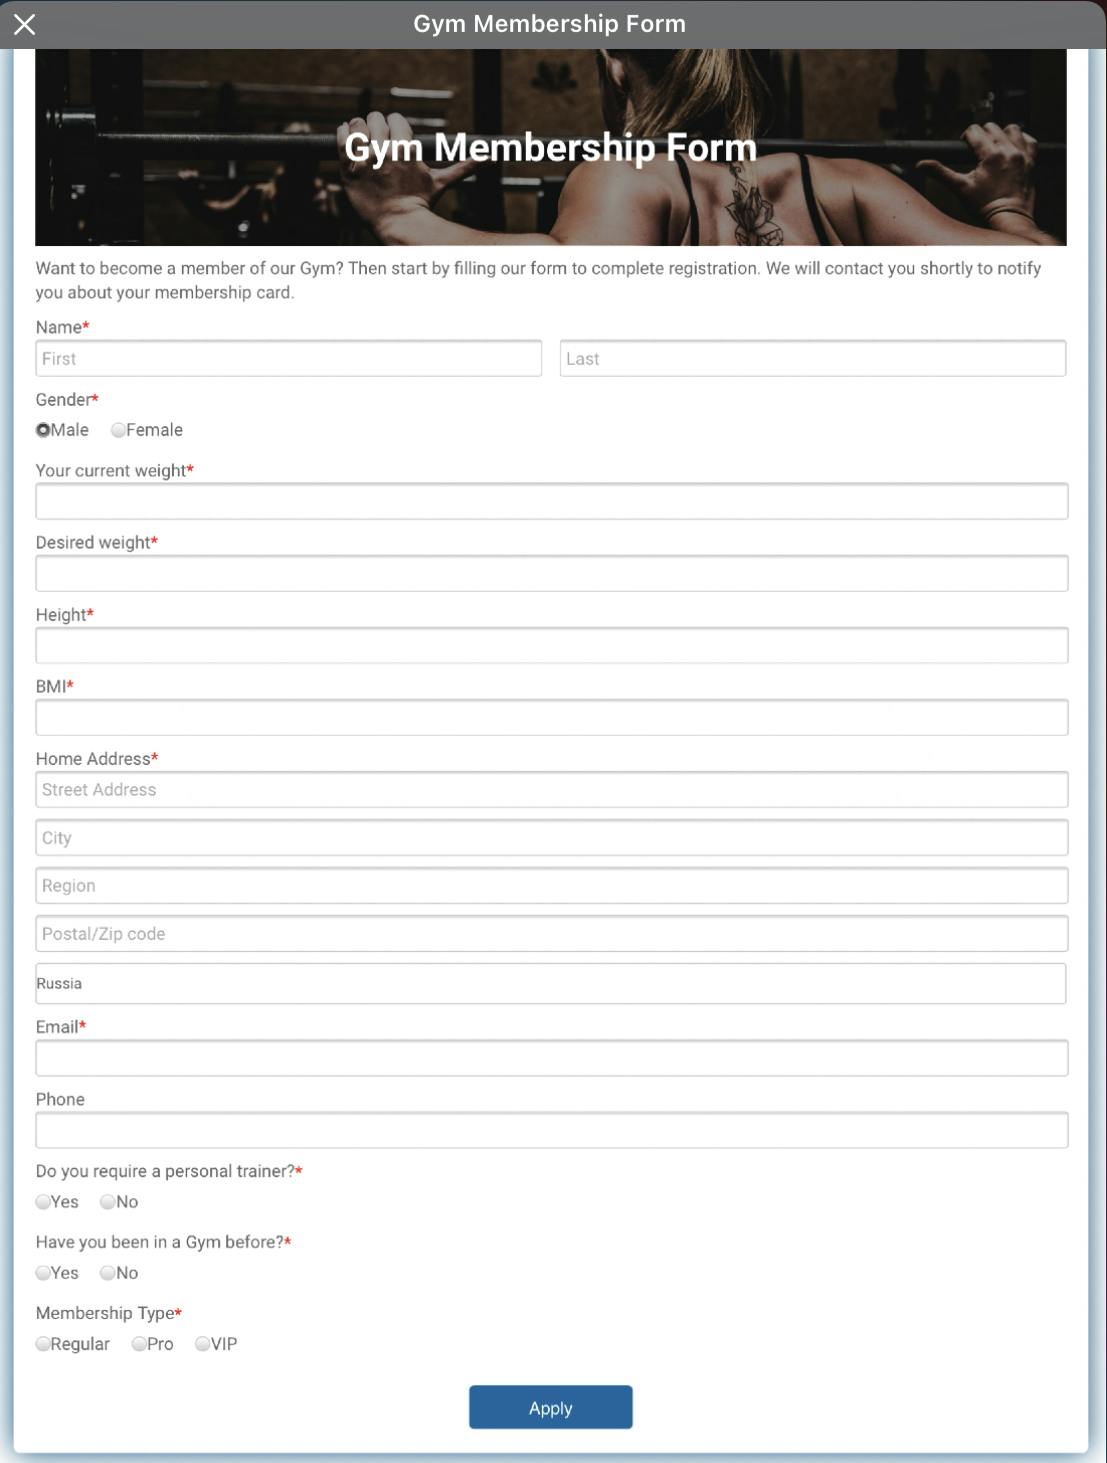
Looks complex enough so we can get some good practice building it.
We already have our Yattag library installed so we can get to work.
Firstly, let's import what we need:
from yattag import Doc
Looking at our final product, we notice that we have some tag nodes containing only text. We can use the line method to write those.
doc, tag, text, line = Doc(
    defaults= {
        'required': 'True',
        'klass': 'item',
    }
).ttl()
We also decide to define some defaults, as all fields except the 'Phone' are required and there seem to be a lot of fields with the same characteristics.
Next we need to structure our form:
doc.asis('<!DOCTYPE html>')
with tag('html'):
    with tag('head'):
        line('title', 'Gym Membership Form')
        doc.stag('link', rel='stylesheet', href='https://fonts.googleapis.com/css?family=Roboto:300,400,500,700')
        doc.stag('link', rel='stylesheet', href='https://use.fontawesome.com/releases/v5.5.0/css/all.css" integrity="sha384-B4dIYHKNBt8Bc12p+WXckhzcICo0wtJAoU8YZTY5qE0Id1GSseTk6S+L3BlXeVIU')
        doc.stag('link', rel='stylesheet', href='style.css')
    with tag('body'):
        with tag('div', klass='container'):
            with tag('form', action='/'):
                with tag('div', klass='banner'):
                    line('h1', 'Gym Membership Form')
We need the asis method for the `<!DOCTYPE html>' tag.
Then we add the html, head and body tags.
We decide to keep the css in a separate file and we use the stag method to bring it in.
html, body {
    min-height: 100%;
}

body, div, form, input, select, p {
    padding: 0;
    margin: 0;
    outline: none;
    font-family: Roboto, Arial, sans-serif;
    font-size: 14px;
    color: #666;
    line-height: 22px;
}

h1 {
    position: absolute;
    margin: 0;
    font-size: 36px;
    color: #fff;
    z-index: 2;
}

span.required {
    color: red;
}

.container {
    display: flex;
    justify-content: center;
    align-items: center;
    height: inherit;
    padding: 20px;
}

form {
    width: 100%;
    padding: 20px;
    border-radius: 6px;
    background: #fff;
    box-shadow: 0 0 30px 0 #095484;
}

.banner {
    position: relative;
    height: 180px;
    background-image: url("gym.png");
    background-size: cover;
    display: flex;
    justify-content: center;
    align-items: center;
    text-align: center;
}

.banner::after {
    content: "";
    background-color: rgba(0, 0, 0, 0.4);
    position: absolute;
    width: 100%;
    height: 100%;
}

p.top-info {
    margin: 10px 0;
}

input, select {
    margin-bottom: 10px;
    border: 1px solid #ccc;
    border-radius: 3px;
}

input {
    width: calc(100% - 10px);
    padding: 5px;
}

select {
    width: 100%;
    padding: 7px 0;
    background: transparent;
}

.item:hover p, .question:hover p, .question label:hover, input:hover::placeholder {
    color: #095484;
}

.item input:hover, .item select:hover {
    border: 1px solid transparent;
    box-shadow: 0 0 5px 0 #095484;
    color: #095484;
}

.item {
    position: relative;
    margin: 10px 0;
}

.question input {
    width: auto;
    margin: 0;
    border-radius: 50%;
}

.question input, .question span {
    vertical-align: middle;
}

.question label {
    display: inline-block;
    margin: 5px 20px 15px 0;
}

.btn-block {
    margin-top: 10px;
    text-align: center;
}

button {
    width: 150px;
    padding: 10px;
    border: none;
    border-radius: 5px;
    background: #095484;
    font-size: 16px;
    color: #fff;
    cursor: pointer;
}

button:hover {
    background: #0666a3;
}

@media (min-width: 568px) {
    .name-item, .city-item {
        display: flex;
        flex-wrap: wrap;
        justify-content: space-between;
    }
    .name-item input, .city-item input {
      width: calc(50% - 20px);
    }
    .city-item select {
      width: calc(50% - 8px);
    }
}
Now that we have something in our form, we can write it on a file to check if our script works as intended:
html_file = doc.getvalue()
with open('index.html', 'w') as f:
    f.write(html_file)
And it looks that our script is working fine. Good job! Let's write some more.
with tag('form',action='/'):
                with tag('div', klass='banner'):
                    line('h1', 'Gym Membership Form')
                with tag('p', klass='top-info'):
                    text('Want to become a member of our Gym? Then start by filling our form to complete registration. We will contact you shortly to notify you about your membership card.')
                with tag('div'):
                    with tag('p'):
                        text('Name')
                        with tag('span', klass='required'):
                            text('*')
                    with tag('div', klass='name-item'):
                        doc.input(type='text', name='name', placeholder='First')
                        doc.input(type='text', name='name', placeholder='Last')
We use the doc.input method as a shortcut instead of with tag('input').
We don't need to specify required in the input field as we already have it as a default. However, we do need to specify klass=required for the span tag to style the asterisk with the red color.
We notice the input fields are pretty much the same, except for the placeholder.
We could write a for loop and have
for data in ['First', 'Last']:
      doc.input(type='text', name='name', placeholder=data)
We try it with the next ones:
with tag('div', klass='question'):
                        with tag('p'):
                            text('Gender')
                            with tag('span', klass='required'):
                                text('*')
                        with tag('div', klass='question-answer'):
                            for data in ['Male', 'Female']:
                                with tag('label'):
                                    doc.input(type='radio', value='none', name='gender', required='True')
                                    line('span', data)
                    for data in ['Your current weight', 'Desired weight', 'Height', 'BMI']:
                        with tag('div'):
                            with tag('p'):
                                text(data)
                                with tag('span', klass='required'):
                                    text('*')
                                    doc.input(type='text', name='name')
We use a for loop for our options in the select tab, too.
with tag('div'):
                        with tag('p'):
                            text('Home Address')
                            with tag('span', klass='required'):
                                 text('*')
                            doc.input(type='text', name='name', placeholder='Street Address')
                        for data in ['City', 'Region', 'Postal/Zip code']:
                            doc.input(type='text', name='name', placeholder=data)
                        with doc.select(name='Country'):
                            for value, description in (
                                ('1', 'Russia'),
                                ('2', 'Germany'),
                                ('3', 'France'),
                                ('4', 'Armenia'),
                                ('5', 'USA')
                            ):
                                with doc.option(value=value):
                                    text(description)
We specify required='False' for the 'Phone' field, to make it not required:
with tag('div'):
                        with tag('p'):
                            text('Email')
                            with tag('span', klass='required'):
                                text('*')
                        doc.input(type='text', name='name')
                    with tag('div'):
                        line('p', 'Phone')
                        doc.input(type='text', name='name', required='False')
                    with tag('div', klass='question'):
                        with tag('p'):
                            text('Do you require a personal trainer?')
                            with tag('span', klass='required'):
                                text('*')
                        with tag('div', klass='question-aswer'):
                            for option in ['Yes', 'No']:
                                with tag('label'):
                                    doc.input(type='radio', value='none', name='personal-trainer')
                                    line('span', option)
                    with tag('div', klass='question'):
                        with tag('p'):
                            text('Have you been in a Gym before?')
                            with tag('span', klass='required'):
                                text('*')
                        with tag('div', klass='question-aswer'):
                            for option in ['Yes', 'No']:
                                with tag('label'):
                                    doc.input(type='radio', value='none', name='personal-trainer')
                                    line('span', option)
                    with tag('div', klass='question'):
                        with tag('p'):
                            text('Membership Type')
                            with tag('span', klass='required'):
                                text('*')
                        with tag('div', klass='question-aswer'):
                            for option in ['Regular', 'Pro', 'VIP']:
                                with tag('label'):
                                    doc.input(type='radio', value='none', name='personal-trainer')
                                    line('span', option)
                    with tag('div', klass='btn-block'):
                        with tag('button', type='submit', href='/'):
                            text('Apply')
And that's all! We're done. Our form looks exactly as we wanted.
Now we have to think how to make it functional. We'll have to find another Python library for that, so we decide to let it for another time.